IMPORTANT NOTE: The instructions below are written from the perspective of an entire class using SmarterProctoring for their quiz/exam. However, we are aware in some instances, instructors prefer a portion of the class to take it live, in person and the rest via off campus (which is where SmarterProctoring would come in).
Please keep in mind, if you are splitting your class up as mentioned above, ensure the settings for your quiz are made to “Available” (not hidden). And the quiz should not be in a hidden block. If hidden, the “in person” group will not be able to access that quiz/exam.
Getting Started:
- Go to your Moodle course homepage and select “Add an activity or resource” in a non-hidden topic block where you want your students to access the proctored exam.
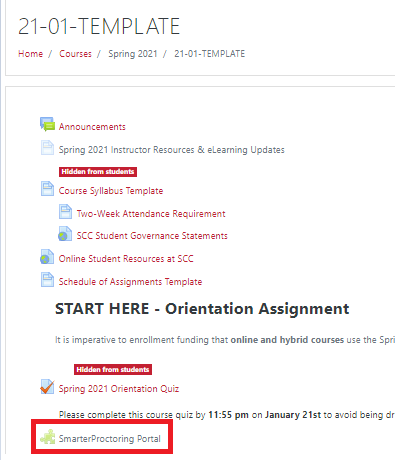
NOTE: The block must not be hidden so students will have access to the new activity/ resource. We suggest adding the portal link in your top block (Block 0). If you choose to do so, it should look like below image.

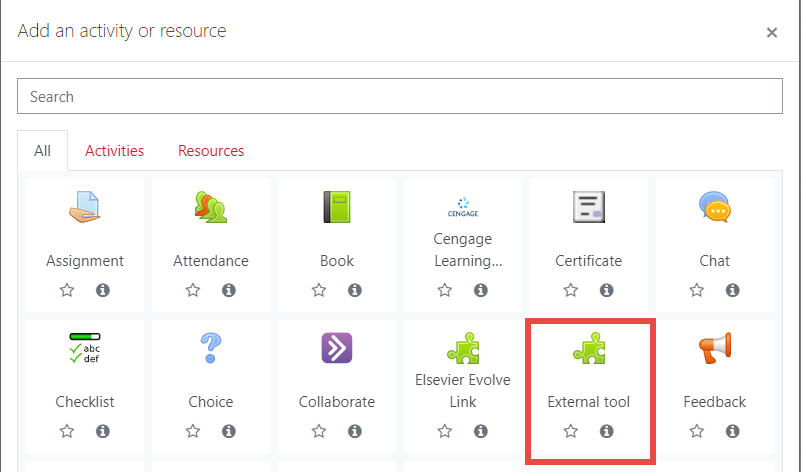
- After clicking “Add an activity/resource”, select “External tool”, then click “Add”.

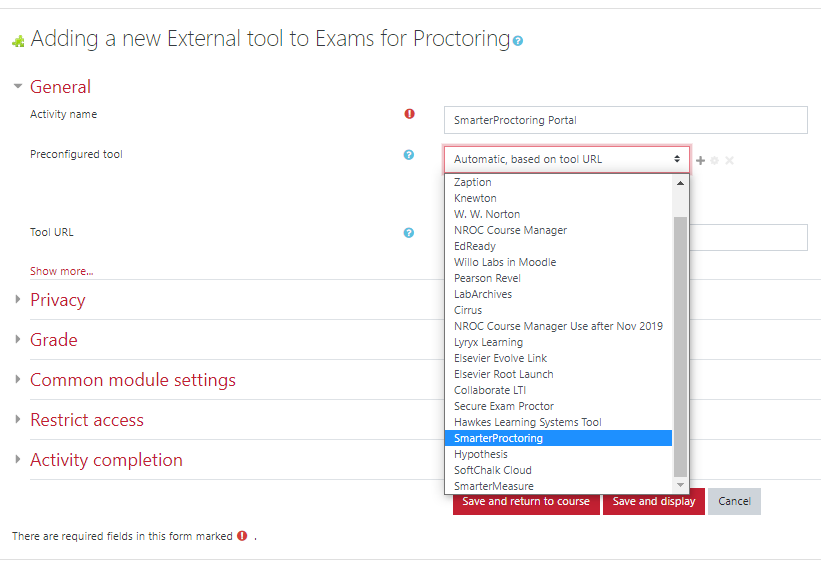
- For activity name, insert what you would like your SmarterProctoring portal to be called. Under Preconfigured tool, select SmarterProctoring. Click “Save and Return to course”. Now, your SmarterProctoring portal link is displayed in your course.
 For your next steps in building the quiz andl linking it to SmarterProctoring, click here for further instructions.
