Once the student is done with the exam, the video evidence will be available under that specific exam within the SmarterProctoring Portal link.
How to review a student’s proctored quiz/exam session?
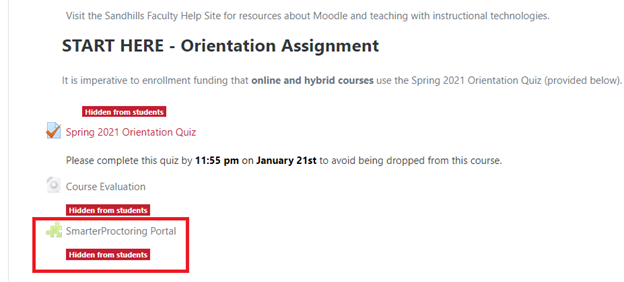
- Logon to your Moodle course page and click the SmarterProctoring Portal link in block 0.
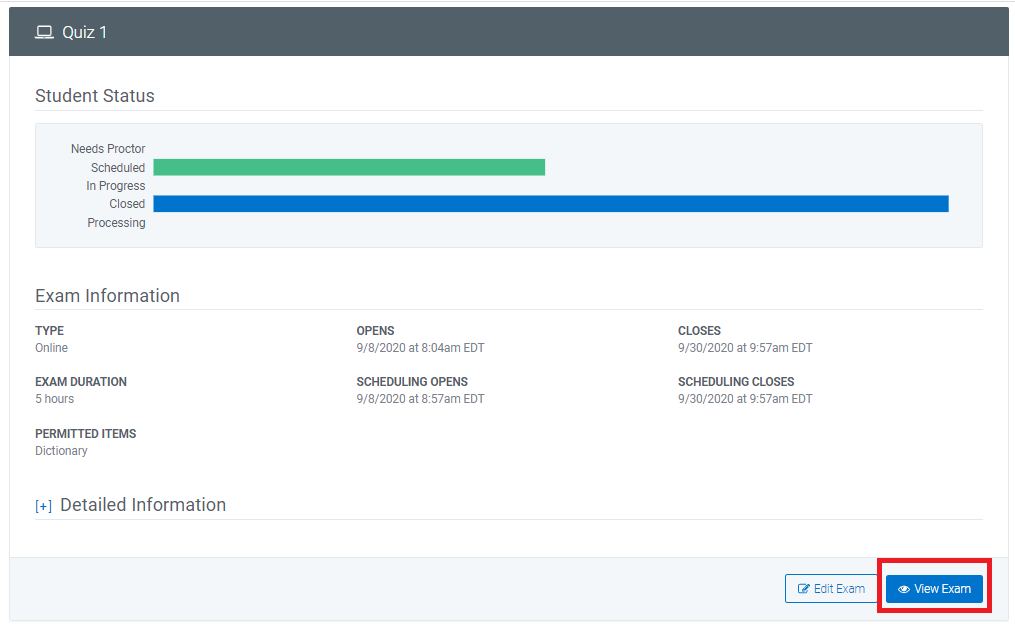
- A course dashboard will appear with a list of all the proctored quizzes/exams you have set up to use SmarterProctoring. Look for the quiz/exam in question, and click the “View Exam” button.
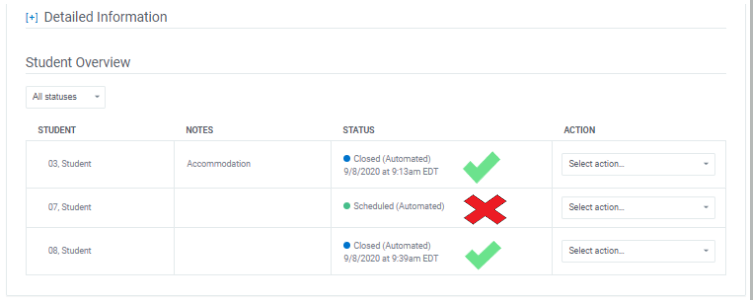
- Scroll down to the Student Overview section. You can only review a session for a student whose exam status says “Closed (Automated)”.
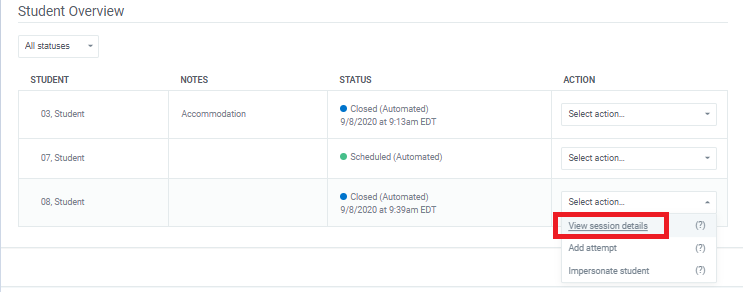
- Under the Action column, select the “View session details” option.
- A pop up window will appear with a video of that student’s session details. You will see the recorded session via their webcam as well as a recording of their browser window. Press the play button.
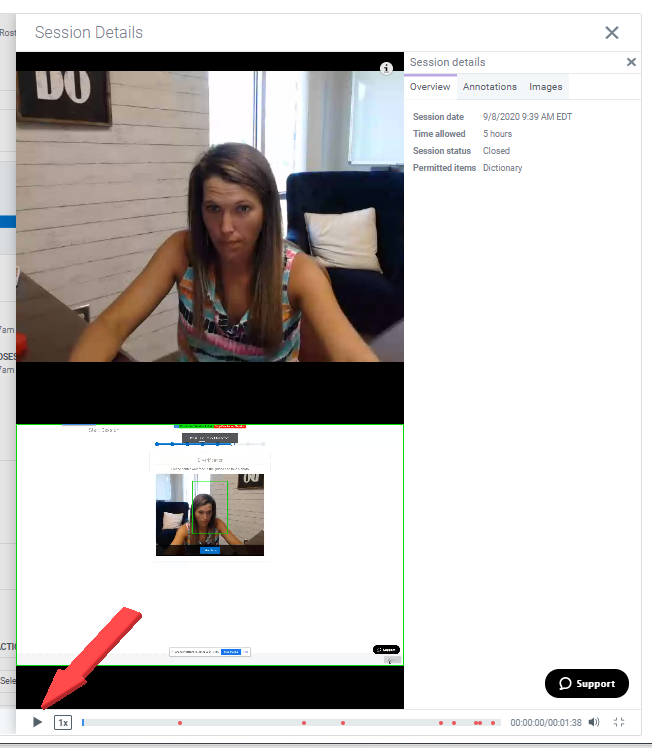
- To the right of the video, you’ll see a few tabs (Overview, Annotations, Images).
a. Overview – exam information
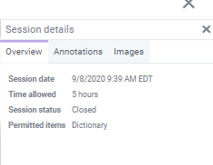
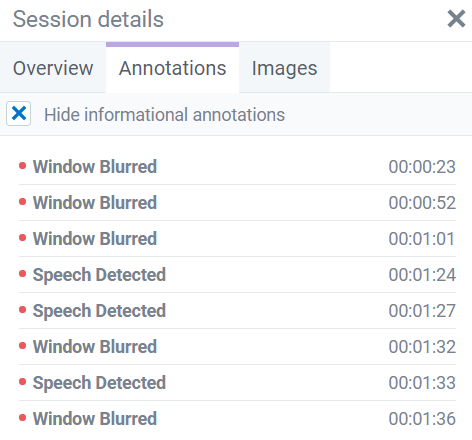
b. Annotations – red flags that the tool picked up during the recorded session. These flags are directly correlated with the red dots in the video scrubber.
NOTE: SmarterProctoring should be used as a deterrent and not the sole basis for investigations. With that said, every red dot may or may not be a valid indicator of what SmarterProctoring deemed suspicious. If you have video/audio enabled for your exam, use your best judgment as an instructor on activity you feel looked or sounded suspicious to you.

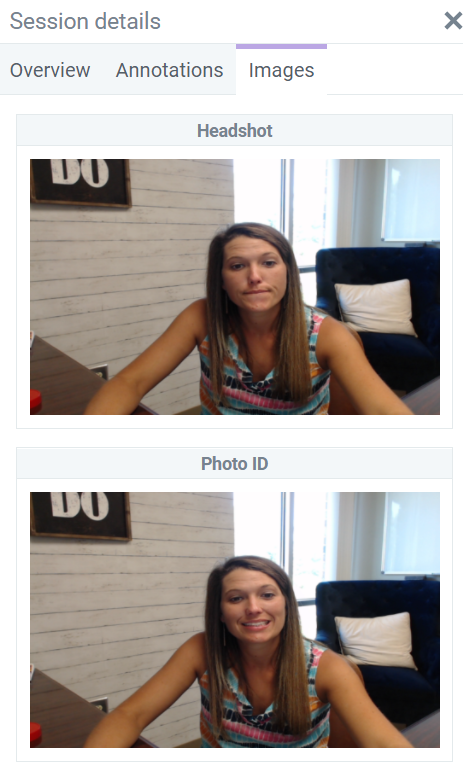
c. Images – student’s head shot and photo ID
I clicked “View session details” and a black screen appeared. How can I fix this?
If you ever experience a black video screen appear after trying to review a student’s exam session, perform the following:
Black Screen Example:
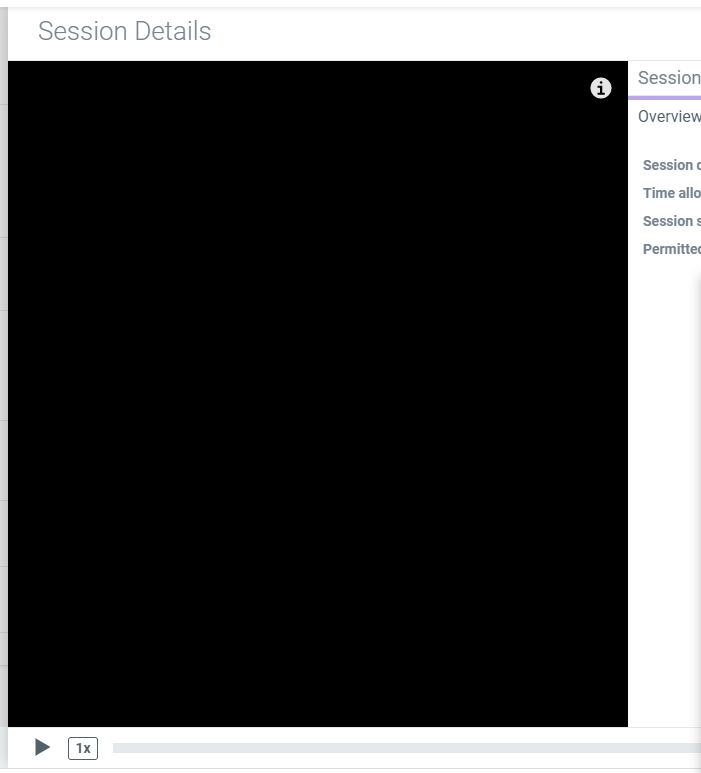
Option 1: Exit Pop-Up Window & Repeat View Action
- In the top right corner of the “Session Details” pop up window, click the big ‘X’ to close it out.

- Under the Action column, select the “View session details” option for that student again to relaunch the video.
- Video should then appear as expected.
- In case the above steps didn’t work, give Option 2 a try (mentioned below).
Option 2: Allow Pop-Ups
If using Firefox, follow below:
- Open a new Firefox window or new tab by clicking the “+” sign next to an open tab or tabs on your Mac or PC.
- Click the gear icon in the top-right corner of the tab, which will direct you to your Preferences.
- Once you’re in Preferences, click the three vertical lines in the top-left and select “Privacy & Security” from the options.
- Scroll to the “Permissions” section, near the bottom of the page.
If using Chrome, follow below:
- When Chrome blocks a pop-up from a website, it displays an icon with a red X in the corner of the Omnibox.

- If you suspect this is an error and want to see pop-ups from this website, click on the icon to see site-specific options, select “Always Allow Pop-ups and Redirects” and then click “Done.”
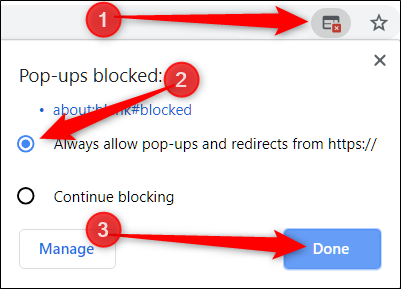
- After you click “Done,” refresh the page to save your choice and see any intended pop-ups on this website.
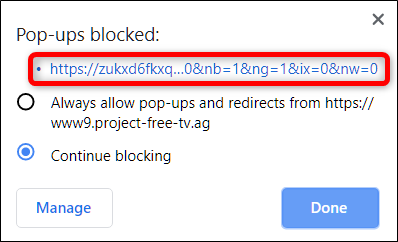
- Alternatively, if you just want to see a pop-up one time, click the blue link in this window and you’ll be redirected to the pop-up that was initially blocked.
I reviewed the exam and confirmed some questionable activity. Now what?
Determining whether a student’s actions during the session are questionable is solely at your (the instructor’s) discretion. You decide how to proceed forward with that student. SmarterProctoring is just tool in place to help you identify such.
