FERPA
Before we get into the details of how to create and use Collaborate, it’s very important you keep in mind FERPA (Family Educational Rights and Privacy Act) policy. Often times, instructors like to record Collaborate sessions and share or reuse that material. For that reason, we need to define what actions are covered under FERPA and which are not.
You are protected under FERPA:
- if you ONLY have yourself (the instructor) lecturing in the recording without the use of your students information (i.e. their names, faces, etc.)
- if the recording is limited to only that specific class section reviewing it.
- if you blur out or de-identify students’ names, faces, or other identifiable information/ features that is displayed in the recording (whether it’s them speaking or you referencing them)
- if FERPA consent using the Sandhills FERPA form from that student was completed and processed.
You are NOT protected under FERPA :
- if you fail to de-identify a student who has not provided FERPA consent.
- if only some students provide consent and others do not. For those who do not, you still must de-identify that student from the recording.
- if you share the recording with student’s information displayed to outside parties without FERPA consent.
- Outside parties include:
- different class sections in the same semester (i.e. 21-01-CIS110-N02 & 21-01-CIS110-N05)
- different class sections in a different semester (i.e. 21-01-CIS110-N02 & 21-02-CIS110-N05)
- any other course outside of the class
- third parties in or outside of the college
- Outside parties include:
If you have further questions or concerns regarding what qualifies under FERPA and Collaborate recordings, feel free to contact us here from the eLearning Team.
How to Create Collaborate
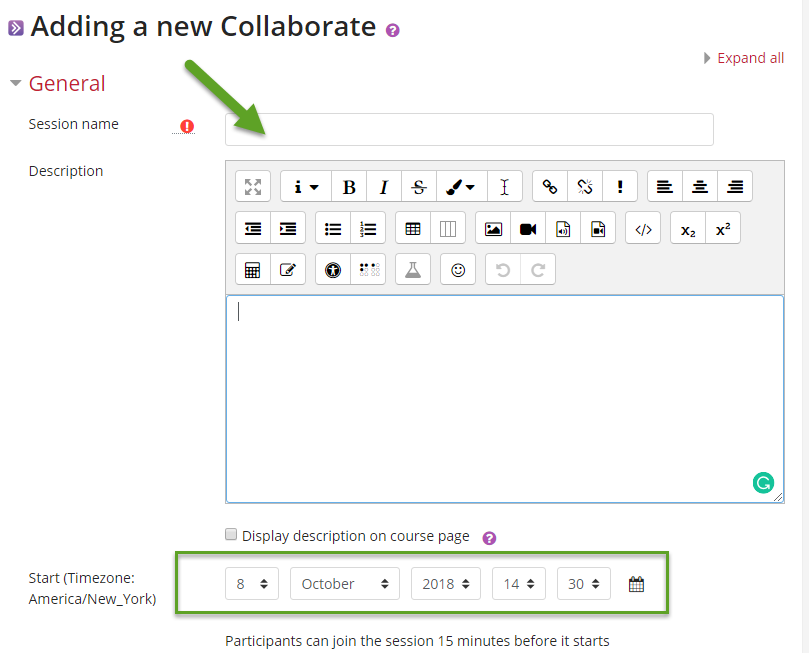
To add a Collaborate session to your course, toggle the Edit Mode button and click “Add an activity or resource”. Select “Collaborate”

Insert the name of the Collaborate session, date and time.

Use the “Duration” drop-down box to select how long the session should be available to students. By default, sessions are scheduled for an hour. If you want to keep the session open, select Duration of course.
If you would like a guest to be able to join the session, select check-box “Allow Collaborate guest access”. Use the drop-down box to assign the guest a role (presenter, moderator, or participate).

Grades can be assigned based on participation, attendance, presentations, etc. Expand the “Grade” menu and select the method of grading:
- Scale: Use a scale to grade. Select the scale you want to use from the Scale menu.
- Point: Use points when grading. Type the maximum number of points that can be earned.
Click “Save and return to course”.
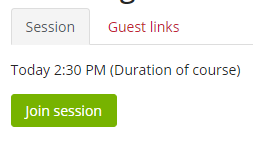
To join the session, click on the Collaborate link and click “Join session”

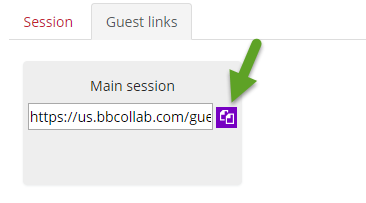
To share the Collaborate room with a guest, click on the “Guest links” tab and copy the guest access link to share with the guest.

Guide for students needing assistance using Collaborate: How to Join Collaborate – pdf
Breakout Groups
Breakout groups can be useful in Collaborate if you plan to use small groups while teaching. As an instructor you’re able to pop in and out of whatever group you choose. Students will only be limited to the group you place them in.
For further information on how to setup the breakout groups, click here.
