Depending on your personal preference, you can export your courses calendar events into either Outlook or Gmail. This can be done by you and your students by following the directions below:
IMPORTANT NOTES:
- Calendar block must be enabled in your course.
- The export may have to be updated in the future because it will not add new events dynamically.
Part I
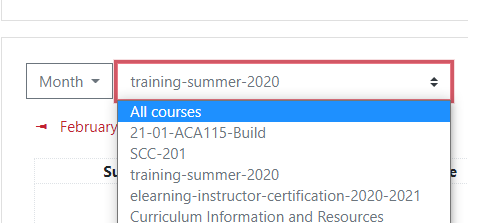
- Select your course from the Moodle dashboard. Select the month/year hyperlink within the calendar block (i.e. March 2021).

a. There is a drop down that will allow you to select the course you want to export the calendar for. Click on the desired course.
NOTE: Selecting the “All Courses” option is not enabled for instructors. You will have to repeat this process per each course with the Calendar block.
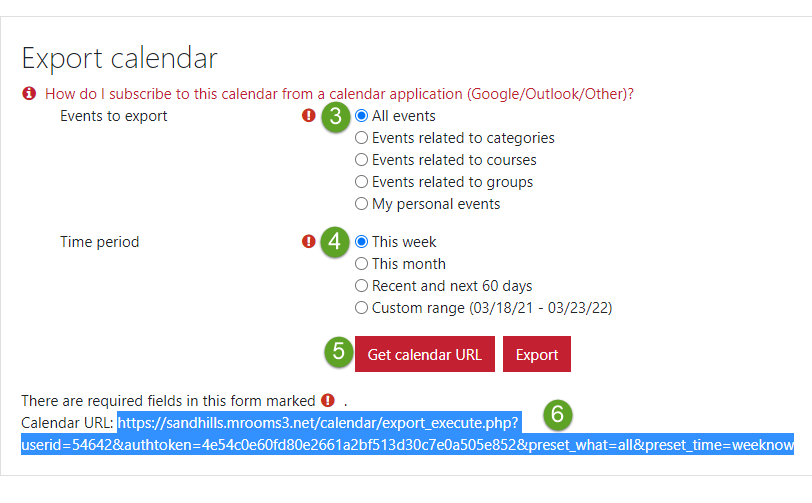
- Click “Export Calendar”.
- Under the “Events to Export” setting, select “All Events”.
- Under the “Time Period” setting, select “Custom range”. This guarantees all events will be included that are currently set in the course.
- Select “Get Calendar URL”
- Copy the full URL provided. If you’d like, paste it in Notepad for easy access in the upcoming steps.
Part II
Outlook
6. Login to your Outlook email.
7. Select “File” > Account Settings > Account Settings again from the drop down menu
8. Select the “Internet Calendar” tab. 
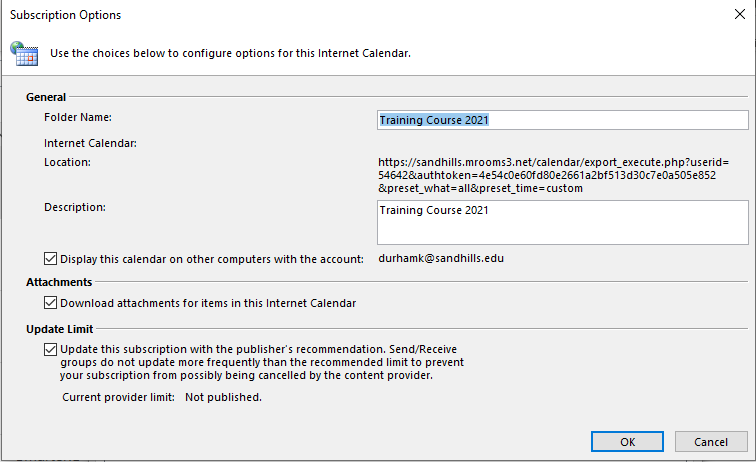
9. Select “New”, then paste the URL from the Moodle export (from Part 1, Step 5).
10. You can give the calendar a name and description. Enable the checkboxes under the “Attachments” and “Update Limit” headers. Select “OK” when done.
11. Now, when you go to the Outlook Calendar, both calendars will appear (assuming you have the checkbox next to your new calendar selected in the left hand panel)
12. If you want the calendars to become one, right click on the new calendar and select “Overlay”.

Google Calendar
6. In a separate tab logon to your personal Gmail account.
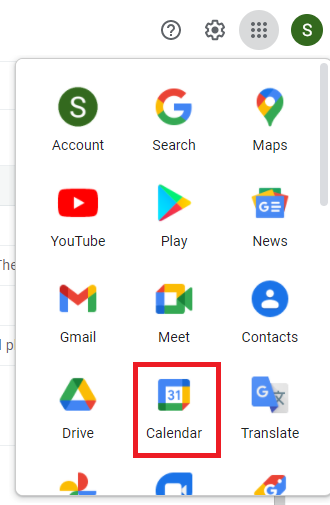
7. Select your “Google Apps” option in the top right corner beside your account profile picture and click “Calendar”.
9. In the left hand panel under “Other Calendars” select the plus sign. Click “From URL”.
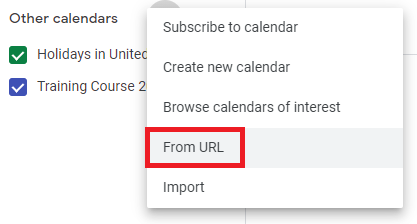
10. Paste the URL from the Moodle export ( from Part 1, Step 5) and select “Add Calendar”.
