SmarterID
SmarterID is an authentication tool that documents attendance and guarantees the student who registered for the class is the same person completing the work. The authentication check is triggered randomly, so the student doesn’t know when it will occur. It’s course specific; therefore, when it does trigger, it authenticates the student after accessing the course, not per Moodle login. Any suspicious activity will be flagged and the instructor will be notified of such through the SmarterID dashboard.
Student Guide
This SmarterID student guide will help familiarize the student with what to expect when prompted to authenticate themselves. I highly suggest providing this guide to the students when introducing them to this, so they will be well aware of what’s expected of them and what options they may see on their end as far as them “skipping” a challenge, etc.
Challenge Options
There are a few methods used to authenticate your students. Review a few below:
- Biometrics
Biometrics uses facial recognition to compare a student’s face to the referenced student ID stored in the system from onboarding.
- Keystroke Logging
The keystroke option prompts the student with a sentence. Based on their keystrokes, SmarterID uses an algorithm to determine how confident they are that the student is in fact who they say they are.
These challenge methods are setup for all assignments except quizzes/exams, so we can ensure no distractions occur during a student’s testing time.
Dashboard
The dashboard will be your go to spot to review your students’ verification attempts.
It will look similar to the image on the right.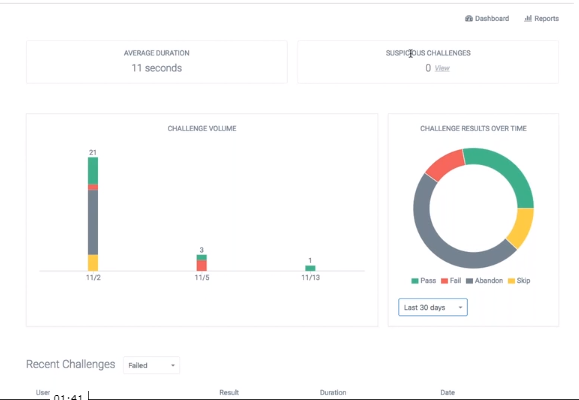
Average Challenge Duration: The average amount of time the challenge lasted for the student
Suspicious challenges: Any challenge that the system considers to be deceptive. For example, if we detect that the student has logged into two geographic locations within an unreasonable amount of time, it would classify as “suspicious” activity.
Challenge Volume: The number of challenges within a particular window.
Challenge Results Over Time: A graphical representation of the results of all the challenges within a specified window. The window can be specified using the date range picker (i.e. last 30 days, last 7 days, etc.)
Recent Challenges: shows the students’ most recent challenges and their results. Includes a drop down menu for challenge results (i.e. Pass, Failed, Abandoned, Skipped, Suspicious).
Individual Student Breakdown
Under “Recent Challenges”, by default, the drop down will show you the Failed attempts as those are the students you may want to pay close attention to. For a deeper dive, into their challenge, click on the recorded student attempt.
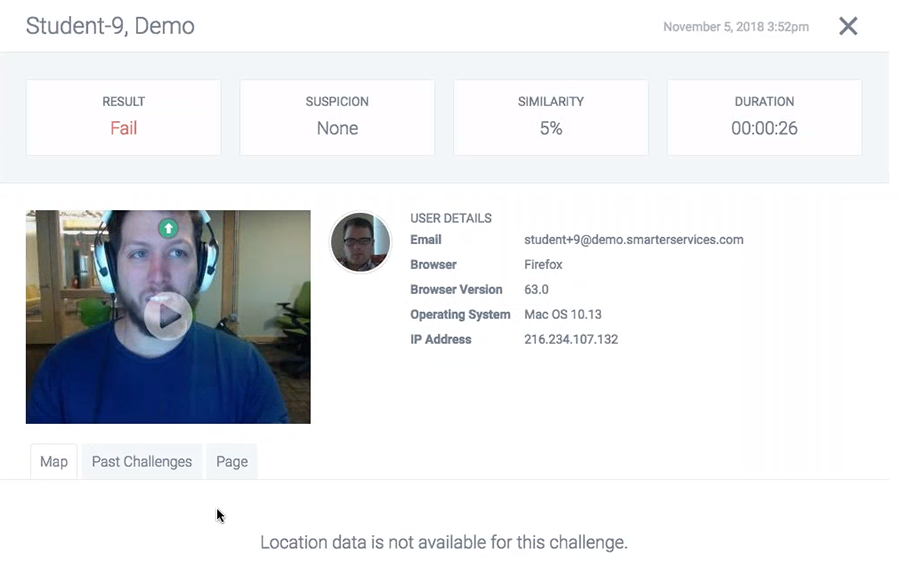
The challenge & user details will appear for your perusal. At the bottom left, you’ll see 3 tabs: Map, Past Challenges, and Page.
Map: will show the user’s location data as per that challenge.

Past Challenges: list of previous challenges this user had to complete.
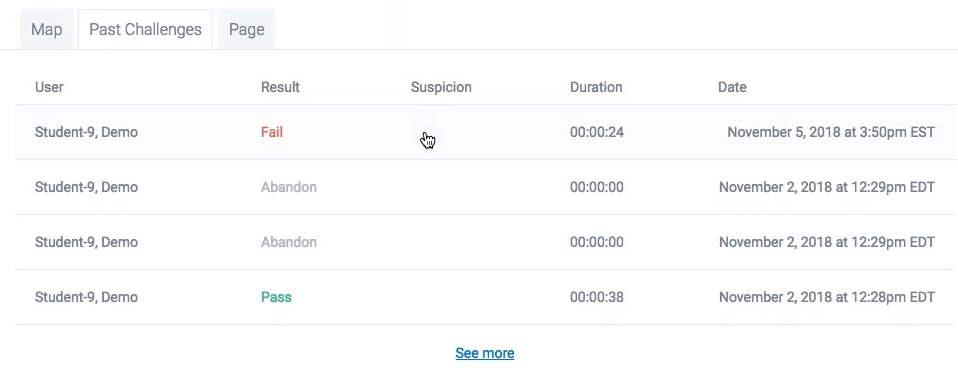
Page: the link to the page the user accessed when asked to complete challenge.
Reporting
To access Reports, click the option in the top right of the dashboard named “Reports”.

You will see the following three options:
Roster: a list of students who entered the course. It will show you if students completed the facial verification setup, face matches, number of times challenged, results, students’ last challenge date, and students’ last seen date.

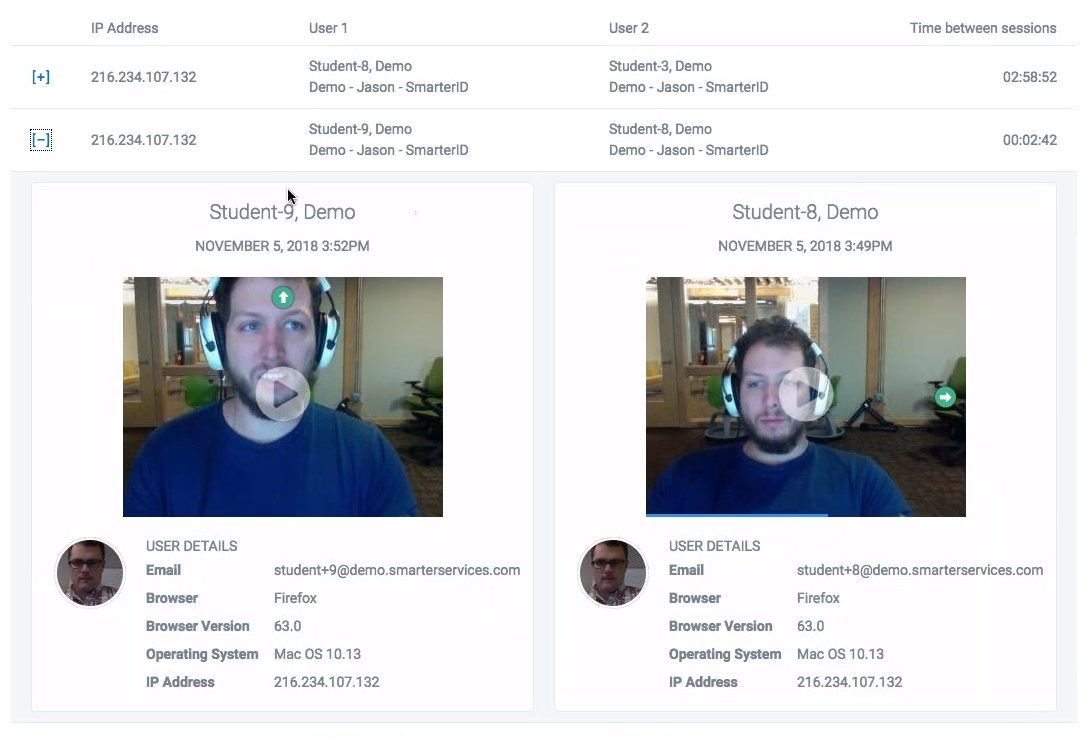
IP Addresses: this will show you the details of students who are on the same network or IP address around the same timeframe, but may be logged in to different accounts.
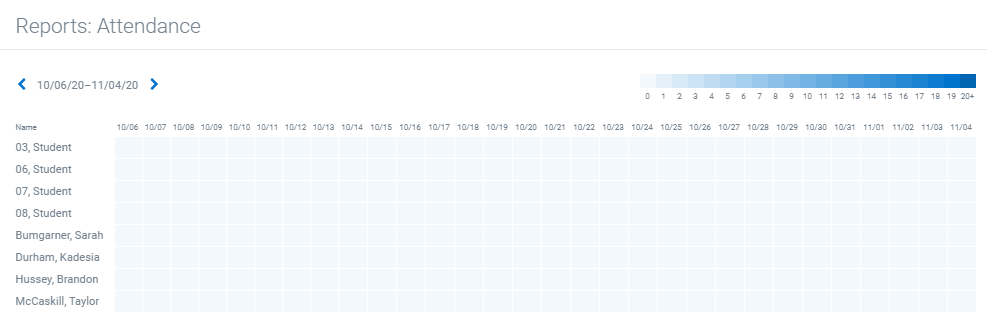
Attendance: graphical representation of when a student accessed the course and the number of times


